February 2014: Less typing! Less searching! Less management drudgery! Who doesn’t want that?
Part Two of Massively Helpful Tips For Outlook includes drag-and-drop techniques to move through tasks faster. Add side-by-side panes and Outlook becomes a task-management dashboard — schedule, assign and send emails like a maestro frog conducting a symphony. Hop on it!:
The following tips work with Outlook 2013 and 2010 for Windows 7 and 8.
1. Create a new item when you drag-and-drop an existing item into a Navigation Pane folder
The new item is created automatically. For example, drag-and-drop an email to:
- Create an appointment: Drag the email to the Calendar folder, and Outlook automatically creates a new appointment with the same subject line from the email as the title of your appointment. The text from the email appears in its entirety in the notes section.
- Create a task: Drag the email to the Tasks folder and a task with the email subject line is created automatically. The email text is included in the notes just like the Calendar item.
- Create a contact: Drag the email to Contacts folder and voilá! Outlook creates a new Contact – the person’s name and email address already there. Just add phone numbers, addresses, and other information if you want.
- Create a saved copy of the email: Drag an email to the desktop or into any folder and a copy will be saved there as a single file. The original email remains in Outlook — a super quick way to keep project emails together.
2. Use the drag and drop technique across Outlook
- Create a calendar item from a task so you can get it on your schedule
- Delegate a task to someone else by dragging and dropping it into their contact — an email with the task title is created automatically
- Create an email from a calendar item as a reminder or to rally the team
3. Choose which text you want to include
Don’t want to include all of the text from the original item in the new item? Just select the text you want transferred, THEN drag and drop.
4. View panes side by side to create items even faster
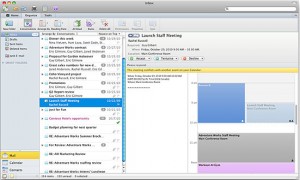
Get visual! View Outlook panes next to each other. When viewing your Calendar and Inbox side by side, for example, you can quickly drag and drop an email directly into a specific calendar date to create an appointment — no need to use the Navigation Pane folder. This is an especially efficient technique when you’re creating a lot of appointments or tasks. Click the Open in New Window button in the View tab to open another pane.
 Here’s more on drag-and-drop and side by side panes in Outlook, plus our Outlook in-person training:
Video Tutorials:
HowTech: How to Drag and Drop Items in Outlook 2010
Infinite Skills: Microsoft Outlook 2013 Tutorial — Adding Tasks To The Calendar (start at 1:00)
CNet: Quick Tips: Drag-and-drop Outlook Calendaring (Outlook 2007)
Microsoft
View calendars side by side or overlaid (Outlook 2010)
View multiple calendars at the same time (Outlook 2013)
Articles and Forums
Drag and Drop in Outlook 2010
Outlook Tip: Add Attachment to To Email using Drag and Drop
[well size=”sm”]If your goal is an optimized IT environment that helps your company grow and prosper, you need highly effective Help Desk support. The faster problems get solved, the sooner your team can get back to work. Leapfrog offers a range of managed IT services, including 24/7/365 Help Desk Support. We pride ourselves in our lightning-fast resolution speeds and deep knowledge of all things IT. Customer service as Priority One means no more bottlenecks![/well]

